QuickBooks Custom Reports – Customize reports in QuickBooks Desktop
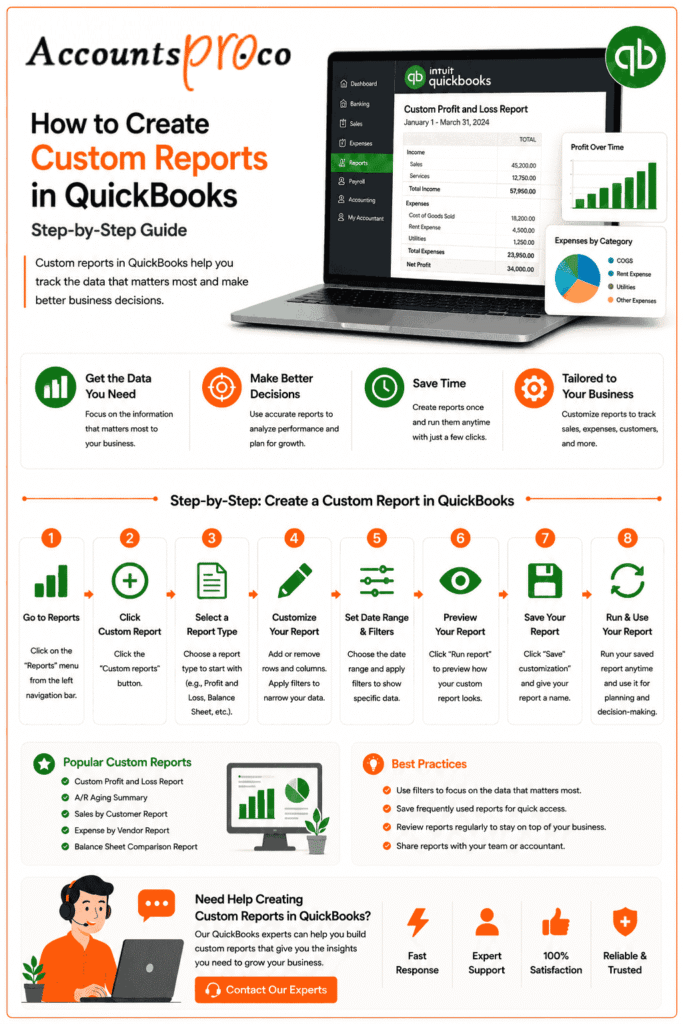
With QuickBooks Desktop, users can completely customize reports to their preferences. This includes the option to customize the data displayed, modify columns, adjust header and footer details, and personalize the font and style for a more professional report.
The available columns and filters vary by report or group of reports because each pulls different information from the company file. Knowing the report source and target is especially important when filtering reports.
The term “QuickBooks custom reports” refers to reports you create. You are authorized to decide how it ought to be shown. QuickBooks offers numerous pre-generated reports that users can modify.
Significance of custom reports in QuickBooks:
QuickBooks Custom reports play a major role in monitoring the financial conditions of the business. QuickBooks permits you to create a specific report of the finance domain to visualize the in-depth information of the business. Report customization lets the organization monitor its performance. They can do a comparison between the past and present reports. It acts as an incredible time-saver element of QuickBooks to filter specific accounts and format them according to their convenience. AccountsPro also highlighted Advanced Reporting QuickBooks Enterprise features.
QuickBooks permits report customization through which one can modify the report as per their choice. It includes the addition and deletion of rows & columns, adding information on the footer or header, adding style and font of the data, and more.
Below is the list of steps:
Step 1: Execute a report
Navigate to the reports menu
Search for the preferred report and open it.
Now make use of the general filters present at the top of the report to perform various adjustments such as dates, time, etc.
Choose Customization to display the customization window
Step 2: Report customization:
Here you can easily apply several filters to reports. To set a specific filter on the report, you need to explore the following sections to discover what you can customize.
Below is the list of some sections:
1. Filter section:
Select the accounts that you want to display on the report. All accounts are listed by default. This permits you to add restrictions and criteria to the report. It is used in an organization where there is a need to create a report for an isolated objective like troubleshooting
Below are the steps to apply the filter on the report
Locate the filter list and select the filter that you want to apply
Discover filter detail information; select extra information required by QuickBooks to perform the filter accurately
Highlight the selected filter from the Filter button column; after that, select Remove the selected filter
Hit on Ok
Note: QuickBooks displays a brief description of a selected filter. To know more about the filter, select the Tell me more… button.
If you’re seeing 2 classes on filters when you customize a report, select the Class that is connected to All classes.
2. General section:
Modify things such as report time, font & number format. You can even choose the date manually through the calendar icon.
3. Rows/Columns section:
Select which rows and columns you want to display on the report. There are different categories present in this tab, like display column by, sort by, add sub column, advanced, and more. If you want to add a sub-column to the report, prefer the sub-column tab; there is an advanced tab for the report types, including customer balance detail, Sales by item, sales by customers, and more.
4. Header/Footer section:
This tab allows you to change the details that appear at the top and bottom of the report.
Header information appears above the report data, while footer content appears below the report data. Footer content is visible only in the print preview or printed copy of the report.
Mark or Unmark the boxes for the information you want to add/delete. Use the fields provided to update the information.
To change the alignment, pick from the Alignment drop-down.
5. Font & number section
This tab allows you to customize the style and format of the report. You can adjust different areas of the report by changing the font, font size, and font style.
To adjust the font:
Select the desired area from Change Font for Column.
Click on Change Font.
In the Column Label window, adjust the font, font style, size, effect, and color for the column.
Click OK.
When prompted to apply the changes to all labels, select Yes.
Titles should not exceed 57 characters. Additional subtitle characters can be included, but the date range will no longer be visible. For a report with customized headings, access QuickBooks Desktop Help from the Help menu to view details about the base report from which it was derived.
6. Collapse Columns:
QuickBooks Desktop allows you to collapse report columns related to jobs or classes, so you can easily see totals by job or class without excessive scrolling or the need to export your report to Excel.
To collapse a specific task or category, click the – symbol to the left of the columns you want to collapse.
To collapse all jobs or classes, select Collapse Columns from the report menu bar.
To show all the details again, simply click the + sign or expand the column.
Note: This feature can only be used when sub-tasks or sub-classes are in use.
Hopefully, you have learned through the above-written steps for QuickBooks custom reports. So follow the guidance to create customized reports and save your time. In any case, if you fail to understand the concepts related to the above-mentioned concepts or face any other QuickBooks error, connect with the QuickBooks technical support number of AccountsPro ProAdvisor at toll-free +1-800-983-3087. There is another method available in case you fail to reach through a phone that is dropping an email or can do a live chat to receive an instant reply from the experts.
Frequently Asked Questions
What are QuickBooks Custom Reports?
QuickBooks Custom Reports are reports that users can customize to their preferences, including modifying data, columns, headers, footers, and styles for a more professional report.
Why are custom reports significant in QuickBooks?
Custom reports in QuickBooks play a major role in monitoring the financial conditions of a business. They allow for in-depth visualization of financial information, comparison between past and present reports, and serve as a time-saving tool for filtering specific accounts.
How can I create QuickBooks Custom Reports?
To create QuickBooks Custom Reports, navigate to the reports menu, select your preferred report, use filters for adjustments, and customize details such as filters, time, font, rows, columns, header, and footer for a personalized report.
What sections are available for customization in QuickBooks Custom Reports?
The sections available for customization in QuickBooks Custom Reports include filters, general settings, rows/columns, header/footer, font & number, and the option to collapse columns for easier viewing.
How can I save my customization in QuickBooks Custom Reports?
To save your customization in QuickBooks Custom Reports, select the save customization option after applying filters, modifying sections, and adjusting settings as needed. This ensures that your personalized report is saved for future reference.