

Your Chart of Accounts (COA) acts as the financial foundation of your business. Importing your Chart of Accounts into QuickBooks helps ensure accurate reporting and organized records. Moving your data from Excel to QuickBooks accounts transfer saves you hours of manual entry and prevents classification errors. Whether you use QuickBooks Online or Desktop, this process requires a clean spreadsheet with matching account types and a full data backup as essential prerequisites.
This guide provides detailed information for both platforms, covering file preparation, field mapping, and troubleshooting common errors. By following these technical steps, you establish a consistent accounting structure that simplifies your financial management and ensures your records remain organized and ready for tax season.
Table of Contents
- 1 What is a Chart of Accounts in QuickBooks?
- 2 Benefits of Importing the Chart of Accounts in QuickBooks
- 3 Before You Start: Prepare Your File for Import
- 4 How to Import the Chart of Accounts in QuickBooks Online
- 5 How to Import the Chart of Accounts in QuickBooks Desktop
- 6 Common Errors During Import Chart of Accounts into QuickBooks
- 7 Best Practices for QuickBooks Chart of Accounts Import
- 8 Simplify the Process with Professional Migration Support
- 9 Frequently Asked Questions
What is a Chart of Accounts in QuickBooks?
A Chart of Accounts is a structured list of all financial categories used in your business. It defines how transactions are recorded and grouped within QuickBooks. Each account includes a name, type, and optional number for structured reporting.
The structure typically includes:
- Asset accounts record resources such as cash, inventory, and fixed assets owned.
- Liability accounts track obligations such as loans, payables, and credit balances.
- Equity accounts represent ownership value and retained earnings within the business.
- Income accounts capture revenue generated from products or service-based operations.
- Expense accounts track operational costs such as rent, utilities, and payroll.
A well-organized Chart of Accounts improves visibility into financial performance and supports accurate reporting.
Benefits of Importing the Chart of Accounts in QuickBooks
Importing accounts instead of creating them manually improves both speed and accuracy.
- Bulk importing accounts reduces setup time and removes repetitive manual entry work.
- Predefined account lists ensure consistent naming and correct financial classification.
- Standardized structures maintain consistent reporting across entities and accounting periods.
This approach helps you build a stable accounting structure from the beginning.
Before You Start: Prepare Your File for Import
Complete these steps before starting the import to avoid errors and data rejection. Preparing your data properly prevents issues during the import process. A clean file and correct structure ensure QuickBooks accepts your data without interruptions.
- Create a structured Excel or CSV file with required headers and consistent formatting.
- Ensure account types exactly match QuickBooks categories to avoid rejection.
- Remove duplicate account names to prevent conflicts during the import process.
- Eliminate blank rows, formulas, and special characters from your file.
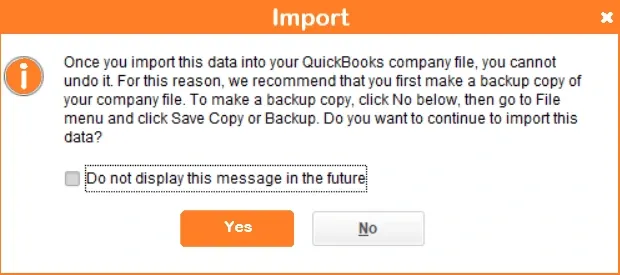
- Back up your company file to protect existing financial data before making changes.
Note: You can also find detailed instructions for the QuickBooks Import CSV file step-by-step process.
Required Column Headers
Use the following column headers exactly as listed. QuickBooks reads these fields to map your data correctly during the import process.
QuickBooks Online
| Field Name | Purpose |
|---|---|
| Account Name | Shows the account name as it will appear in QuickBooks |
| Type | Sets the main category, such as Assets, Expense, or Income |
| Detail Type | Gives a more specific classification within the selected account type |
| Description | Adds details to explain the purpose of the account |
| Number | Assigns a number to help organize and track accounts easily |
| Subaccount of | Links the account under a parent account to create a hierarchy |
QuickBooks Desktop
| Field name | Purpose |
|---|---|
| Name | Represents the account name displayed in the Chart of Accounts |
| Type | Defines the account category used for classification |
| Description | Stores a short description explaining account usage |
| Number | Assigns an account number for structured reporting |
Example row:
Account Name: “Checking Account”, Type: “Bank”, Detail Type: “Checking”, Description: “Main business checking”, Number: “1000”
Ensure there are no extra spaces or hidden characters in your file, as they can cause import errors. Using the correct headers ensures QuickBooks maps your accounts accurately during import.
How to Import the Chart of Accounts in QuickBooks Online
Follow these steps to import your Chart of Accounts into QuickBooks Online. The platform provides a built-in import tool that allows you to upload your account list directly.
Step 1: Upload Your File
- Open QuickBooks Online and go to the Settings menu
- Select Import Data and choose Chart of Accounts
- Upload your prepared CSV file and continue
- Once the file uploads successfully, QuickBooks prepares it for mapping.
Step 2: Map Fields Correctly
- Match account name, type, and detail type with QuickBooks categories
- Review each column to ensure data is placed correctly
Step 3: Review and Import
- Check for highlighted errors in the preview screen
- Confirm account names, types, and numbers match your file
- Click Import to complete the process
This process ensures your Chart of Accounts is imported accurately and ready for use.
How to Import the Chart of Accounts in QuickBooks Desktop
Use the steps below to import your Chart of Accounts into QuickBooks Desktop. This version supports Excel and IIF files and uses a slightly different import workflow.
Step 1: Import the File
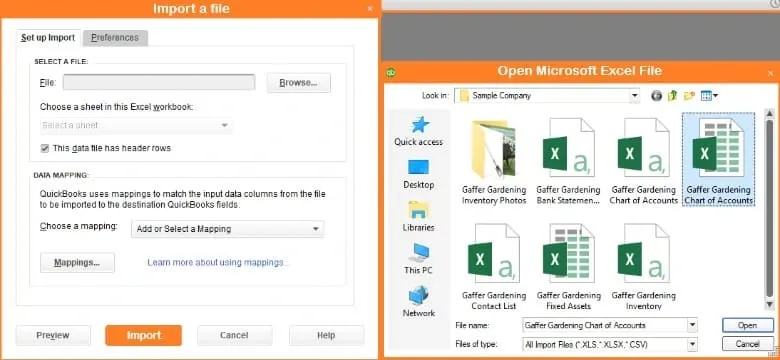
- Open QuickBooks Desktop and go to File, then Utilities, and Import
- Select the Excel or the IIF file depending on your format
- Choose your file and proceed
Step 2: Verify Imported Accounts
- Open the Chart of Accounts from the Lists menu
- Review account names, types, and numbers
This step confirms that your QuickBooks COA import completed successfully.
Step 3: Fix Errors if Needed
- Check the import log to identify failed entries
- Correct the source file and re-import only the missing accounts
This helps resolve issues without repeating the full process from the start.
Common Errors During Import Chart of Accounts into QuickBooks
Errors during import usually happen due to file issues or incorrect data mapping. Identifying these problems early helps prevent failed uploads and incorrect records.
- An unsupported file format prevents QuickBooks from reading and processing your data.
- Duplicate account names stop the system from creating new entries during import.
- Incorrect column headers lead to mapping issues and misclassified account data.
- Blank rows, formulas, or special characters can cause import failures or skipped entries.
Note: If a transaction has already been allocated to the account, you will need to record a journal entry for the opening balance.
Best Practices for QuickBooks Chart of Accounts Import
Following a few consistent practices helps keep your Chart of Accounts clean, organized, and easy to manage over time.
- Use clear and consistent naming to make accounts easier to read and track.
- Keep the account structure simple to avoid confusion in financial reports.
- Limit unnecessary sub-accounts to maintain a clean and manageable hierarchy.
- Review imported data using reports to confirm accuracy and proper classification.
Simplify the Process with Professional Migration Support
Handling large account lists or complex structures increases the chance of errors. Getting extra help can make the process smoother and more accurate.
- A quick review of your file helps ensure it meets QuickBooks import requirements.
- Proper handling reduces manual effort and speeds up the setup process.
- Correct mapping keeps all accounts aligned with your reporting structure.
- This approach helps you complete large imports more efficiently and with fewer errors.
Conclusion
Setting up your Chart of Accounts through import makes your QuickBooks setup faster and more reliable. Once your file is structured properly and mapped correctly, the rest of the process becomes straightforward. Taking a few extra minutes to review your data before and after import helps avoid unnecessary fixes later. With the right steps in place, you can get your accounts ready quickly and focus on managing your finances with confidence.
Frequently Asked Questions
Can you import sub-accounts into QuickBooks?
Yes. Use a parent-child format separated by a colon, such as “Utilities: Electricity,” to create sub-accounts and maintain a clear account hierarchy.
What file format works for QuickBooks COA import?
QuickBooks Online supports CSV files, while QuickBooks Desktop supports Excel and IIF files. Using the correct format ensures a smooth import process.
Why does QuickBooks reject some accounts during import?
QuickBooks rejects accounts when formatting is incorrect, headers are missing, or account types do not match. Cleaning the file and correcting the mapping resolves this issue.
How do you verify the success of an import?
Review the Chart of Accounts after import and run reports like the Trial Balance to confirm all accounts are correctly added and properly classified.
Can you re-import missing accounts after fixing errors?
Yes. Correct the errors in your source file and import only the missing accounts. This avoids duplication and completes your Chart of Accounts efficiently.
